You can try the designer without an account. Sign in or create a free account when you want to save a project or export files.
Choose the print format
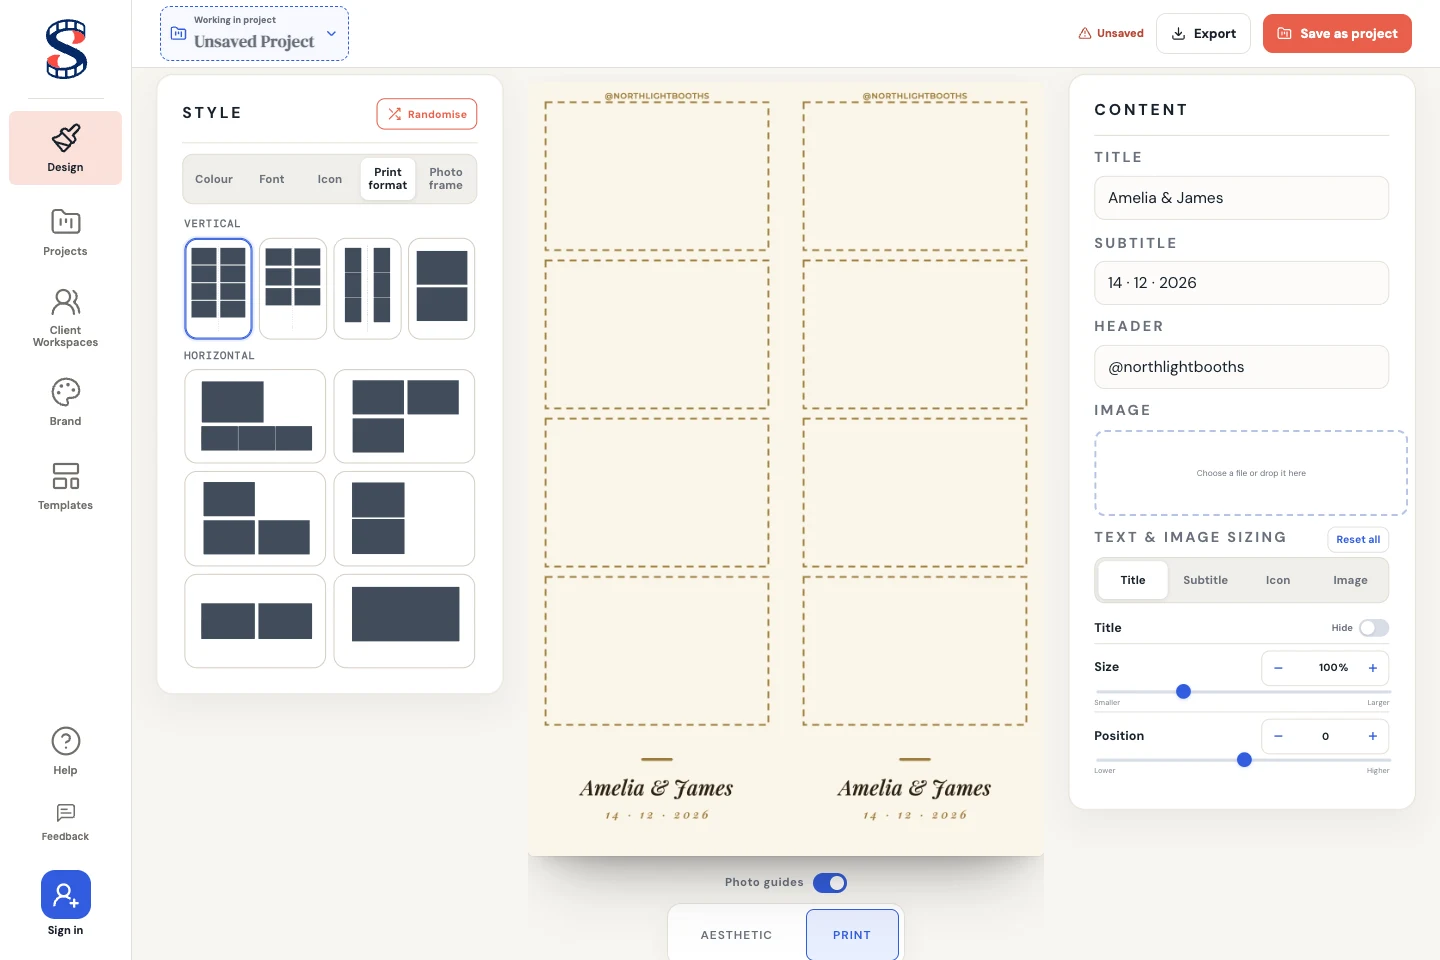
Open Design and choose Print format in the Style panel. Pick the size and photo layout your booth and printer will use before spending time on the artwork.
Switch to Print and turn on Photo guides to see the capture rectangles. Aesthetic gives you a presentation view of the same design.
Personalise the artwork
Work through the editing tools beside the preview. Make the wording easy to read and leave enough room for the event photos.
- Set the event wording
Update the names or headline, date and supporting wording in the content controls. Check the spelling and date with your client.
- Choose the visual style
Adjust the colours, fonts, frame and icon. The preview updates as you edit, so check contrast and spacing at each step.
- Check the print layout
Switch to Print to inspect the photo rectangles and artwork placement. Preview guides help you check the layout; they are not client artwork.
Photo rectangles show where the booth will place captures. A flattened PNG export does not include placeholder graphics; choose a booth package when you need the photo mapping.
Save the event as a project
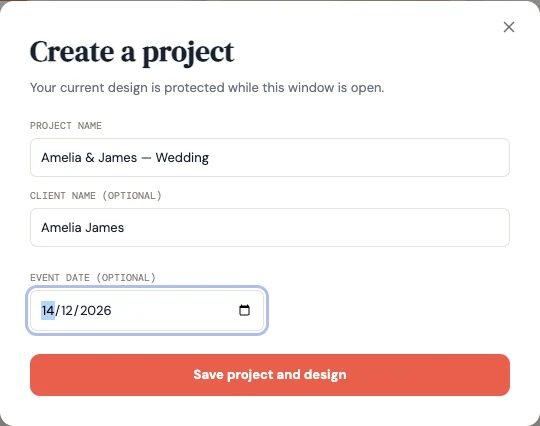
Click Save as project at the top of the designer. Enter a project name, and optionally the client's name and event date, then choose Save project and design.
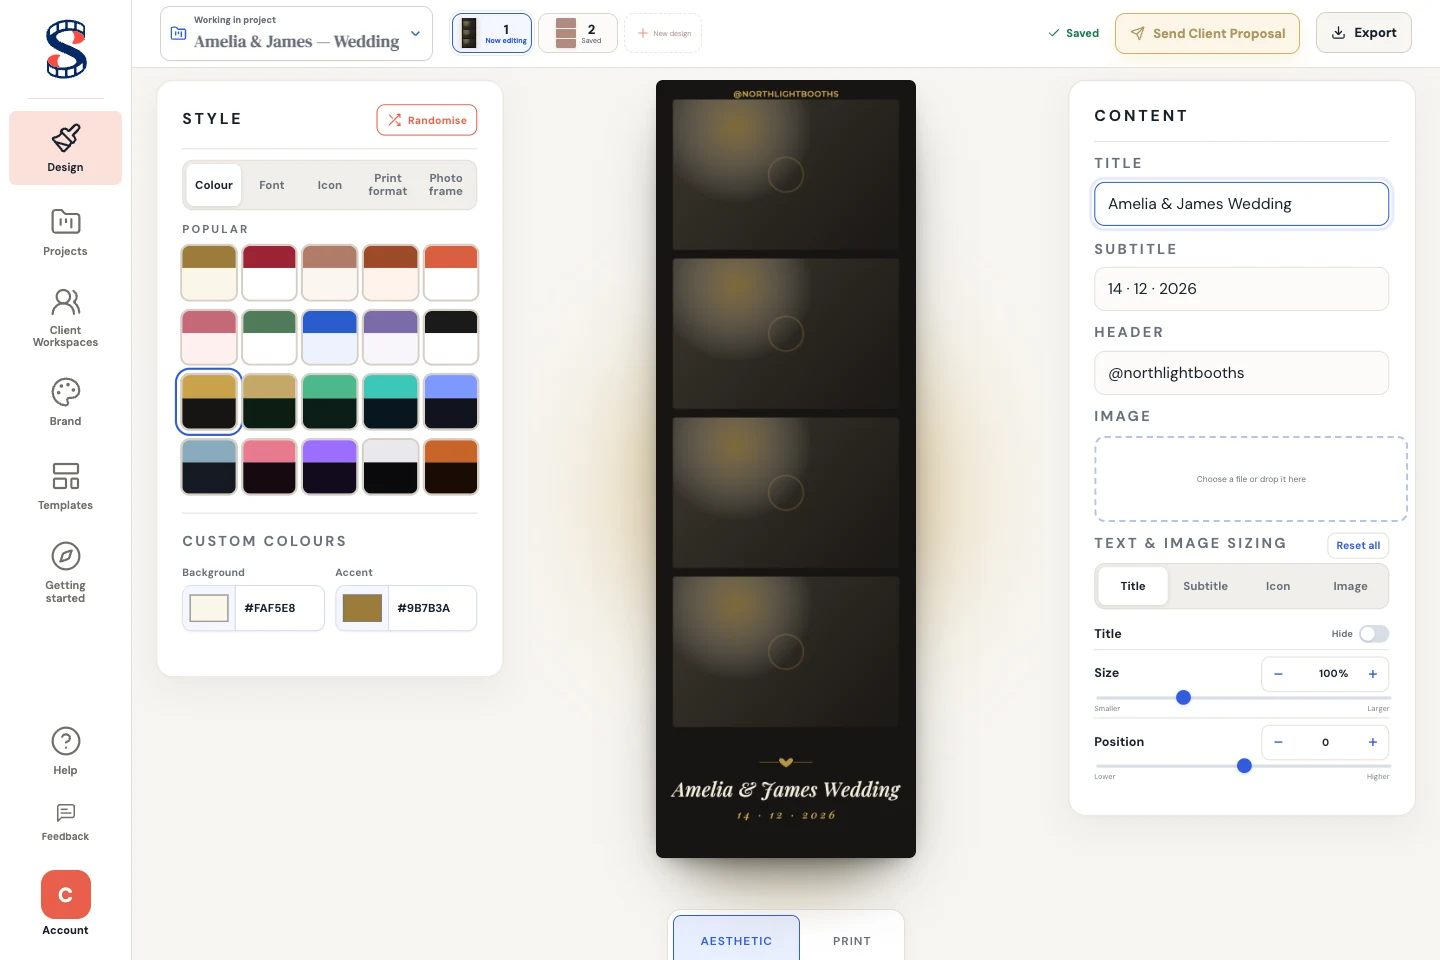
Once a design belongs to a project, your edits save automatically. Wait for Saved before leaving; preview rendering can finish a little later.
Keep the page open and use the recovery action shown. Retry preview regenerates a missing preview after the design settings are saved. A conflict means another tab changed the same design; review the available recovery choices before replacing it.
Create another design option
In a saved project, use New design to duplicate the current option, then change the wording or style. Click a saved option above the canvas to switch between designs.
Each project can hold up to seven design options. These are separate choices for the event; they are not a document version history.
When the options are ready, use Client proposal to send them for review, or Export to prepare your files.
Common questions
Where do I reopen a saved design?
Go to Projects and open the event. Its saved design options appear above the canvas in Design.
Can I import a booth template package?
External template-package import is not available. Create your design in the designer. You can include separate PNG artwork in a proposal, but that does not import an editable booth template.